 |
|
|
|
History of
the Dollhouse
|
| The
inspiration for the dollhouse came from our daughter, Elizabeth.
When I grew up during the great depression, there was no money for such
luxury as a dollhouse. So when we had a daughter, I made sure that she
had a dollhouse as soon as she grew old enough to be able to play with
one responsibly. Elizabeth received a fully furnished Colonial style dollhouse when she was three years old. She loved it. Over the years, she asked for minor changes in it, which her father readily made. She asked for a swinging door between the kitchen and dining room, because our house in Connecticut had such a door. She asked for added wood trim around doors, windows and archways, a new staircase and several other "home improvements" until she was completely satisfied. It was her all time favorite possession. Before leaving home to attend Swarthmore College in 1977, Elizabeth carefully wrapped up the dollhouse and all of its furnishings and asked us if, when we retired, we would refurbish the dollhouse so that she could have it for a daughter she hoped she would eventually have. When we retired in the winter of 1990 we brought the dollhouse to Maine with us, expecting to begin the project in the springtime. But when Elizabeth visited us in Maine for the first time, she fell in love with our historic home. She asked if we had brought her dollhouse with us when we moved here from Connecticut and then she asked if she could have a miniature of our historic house instead, and so began our fifteen year effort to create this unique miniature. |
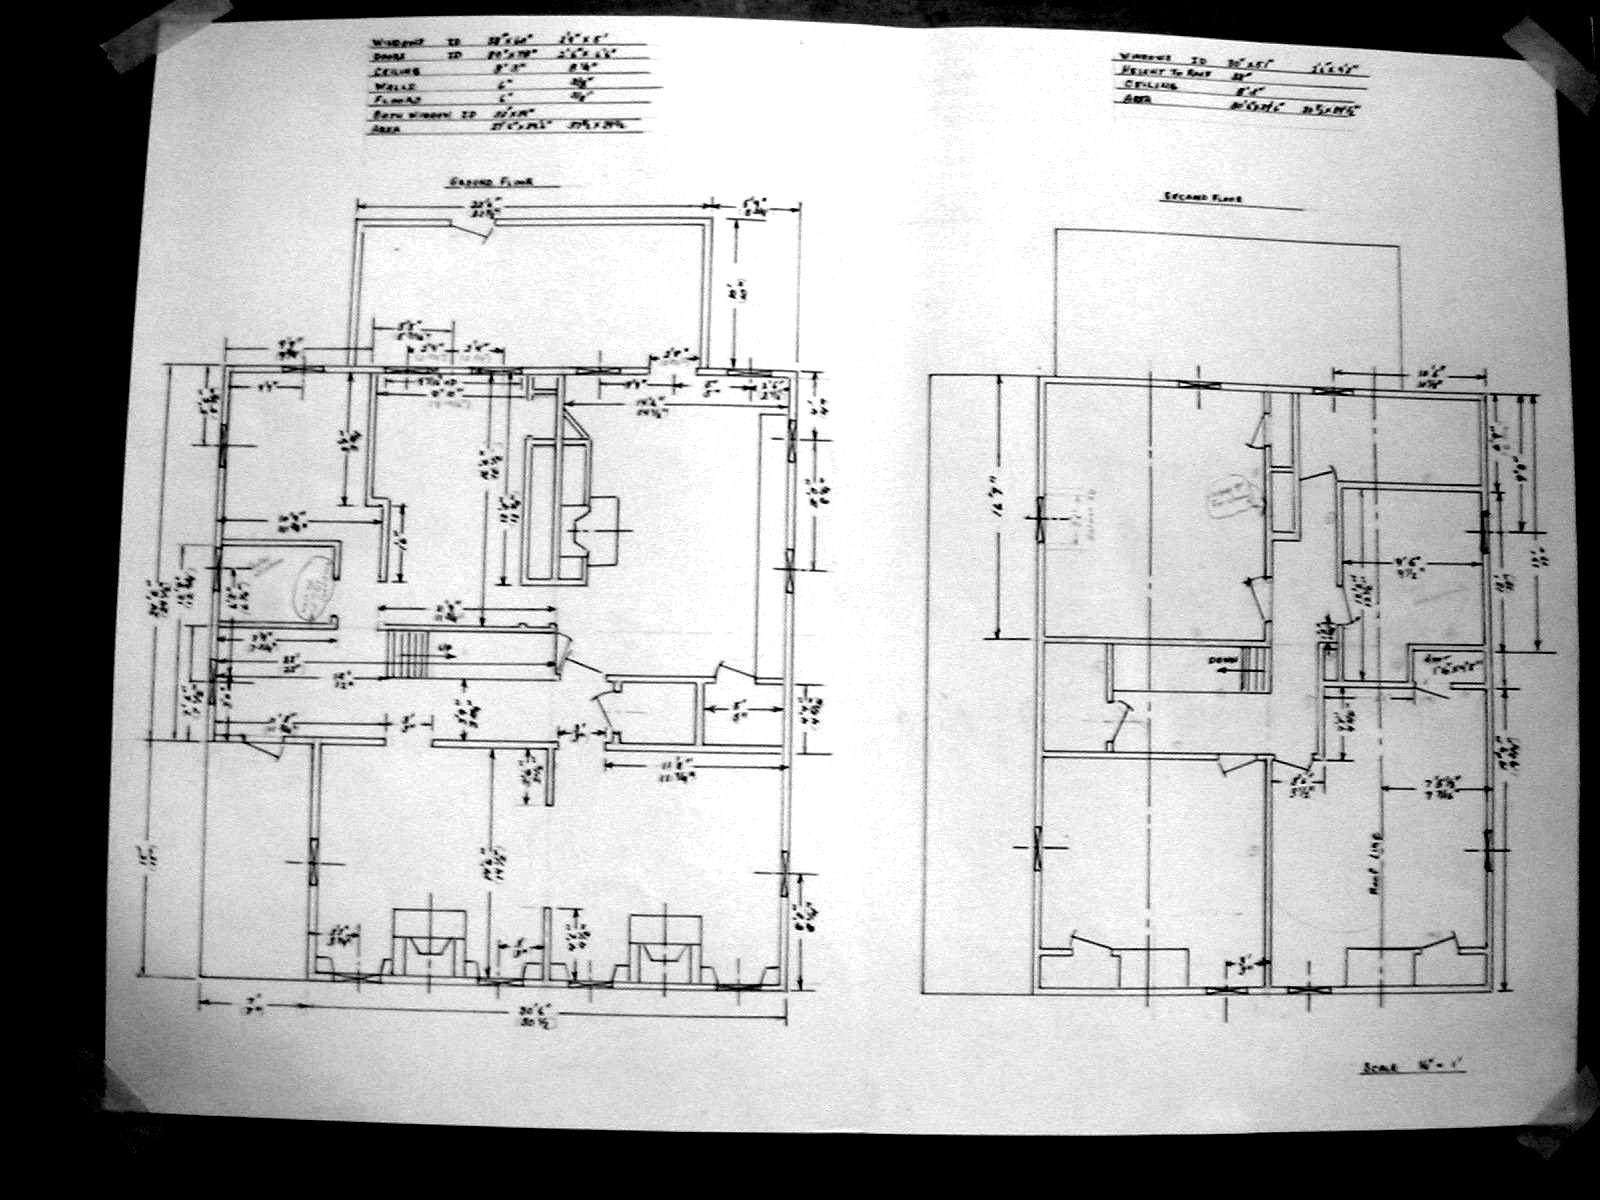
| The first year of this challenge
was taken up with Olof drawing architectural plans for the house,
including exterior elevations and profiles of all of the interior and
exterior wood trim and
the fireplace mantles. Being a cape, we quickly realized that the house had to be built differently from all dollhouses we had seen before. Colonial and Victorian houses can all be created with one entire wall that either opens or can be taken off to allow access to all of the rooms. But this can not be done with a cape, especially not with one that is three rooms (counting the hallways) deep by three rooms wide. In order to figure out the logistics to make every area reachable, we decided to first create an unadorned foam board model before committing ourselves to wood. Working with the foam board and the relative size of the rooms, it became readily apparent that certain places could not be reached by a child's shorter arms and much smaller hands. We literally "borrowed" a neighbor's child to act as our guide to see how far into each space a child could reach. |
 |
| That experiment made us
realize that we needed to create nine separate panels that would
open to
various sections. You could not open them all at the same time
but you
could play in each section of the miniature with the exception of one
very small hall between the guest room and the second floor bathroom.
That space can not be played in and the bookcase in that area is the
only one that is not completely accessible. The advantage of the
nine
panels is that when all of them are in the closed position, the
miniature house looks exactly like the real house. The entire project was a series of challenges, experimenting and finding solutions. We learned as we went along. For every challenge, we had to find a way of creating something that would work to look like the original but be made of something that was of a much smaller scale than the original. Eventually, one begins to "think in miniature." By that, I mean that you can look at something large and realize that a very small section of it is just what you need to use to create something entirely different. For example, when creating over 2,500 miniature books with pages, we did not know what we could use for book covers. Cardboard and leather were out of scale. One day, while looking at a colorful calendar, we realized that within those large phonographs, reproduced on heavy grade shinny paper, there were sections that looked like old fashioned marble patterns frequently used for book bindings on older books. A scene showing colorful fall leaves, for example, if cut into small rectangles, worked perfectly for the effect we were tying to create. And the added benefit of using calendar material was that it is strong and will not easily tear. It is also more waterproof than ordinary paper. Therefore, the glue used would not bleed through the paper. A similar challenge came about when we were looking for a material to use instead of marble for our fireplace mantles. Real marble can not be cut thin enough to keep it in scale and the pattern would be far too large to look real. Solution: a counter top material of which we needed only the scraps from a larger project. The company gave us the material free as it was going to be thrown away. It was too small for them to use but perfect for our purposes. |
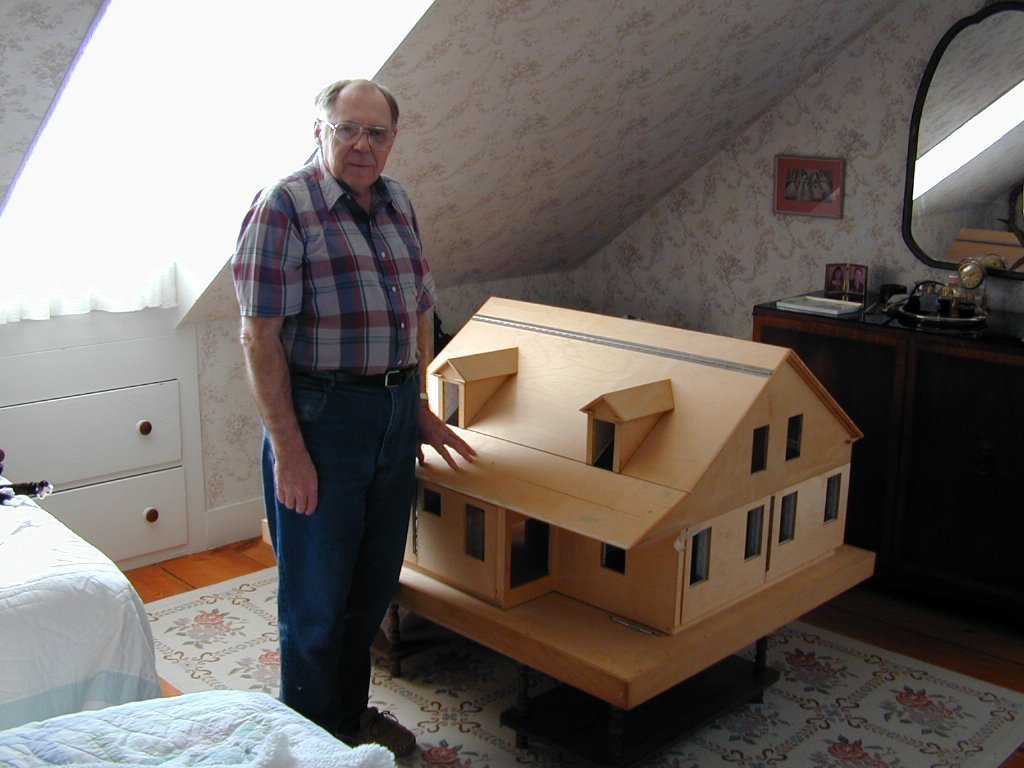 Olof with the dollhouse shell when it was in our guest room. |