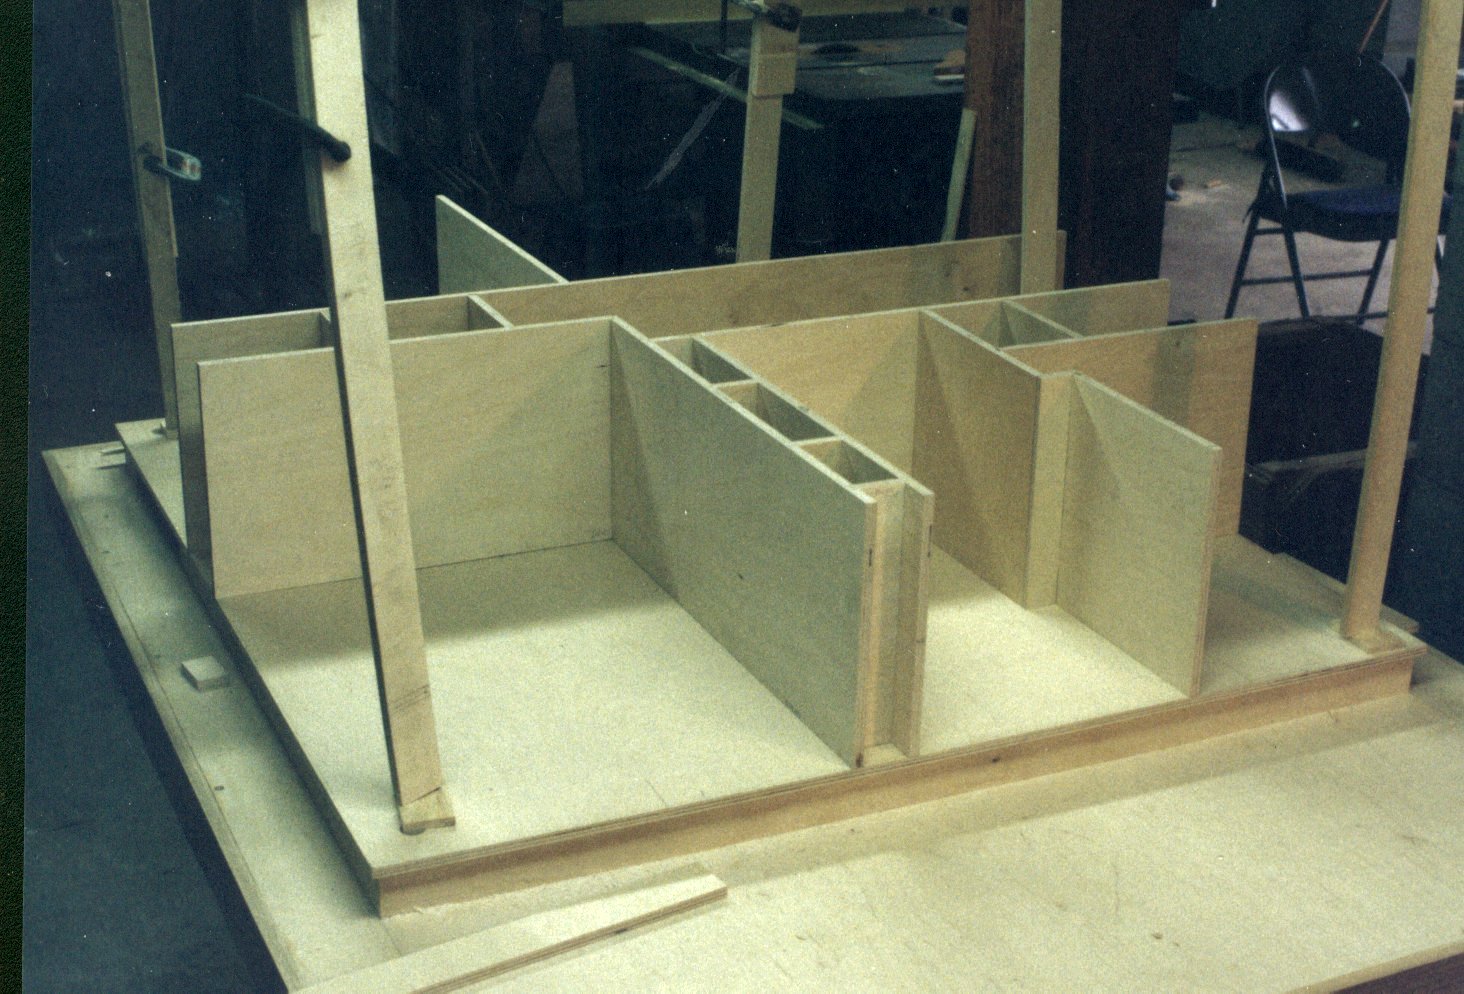
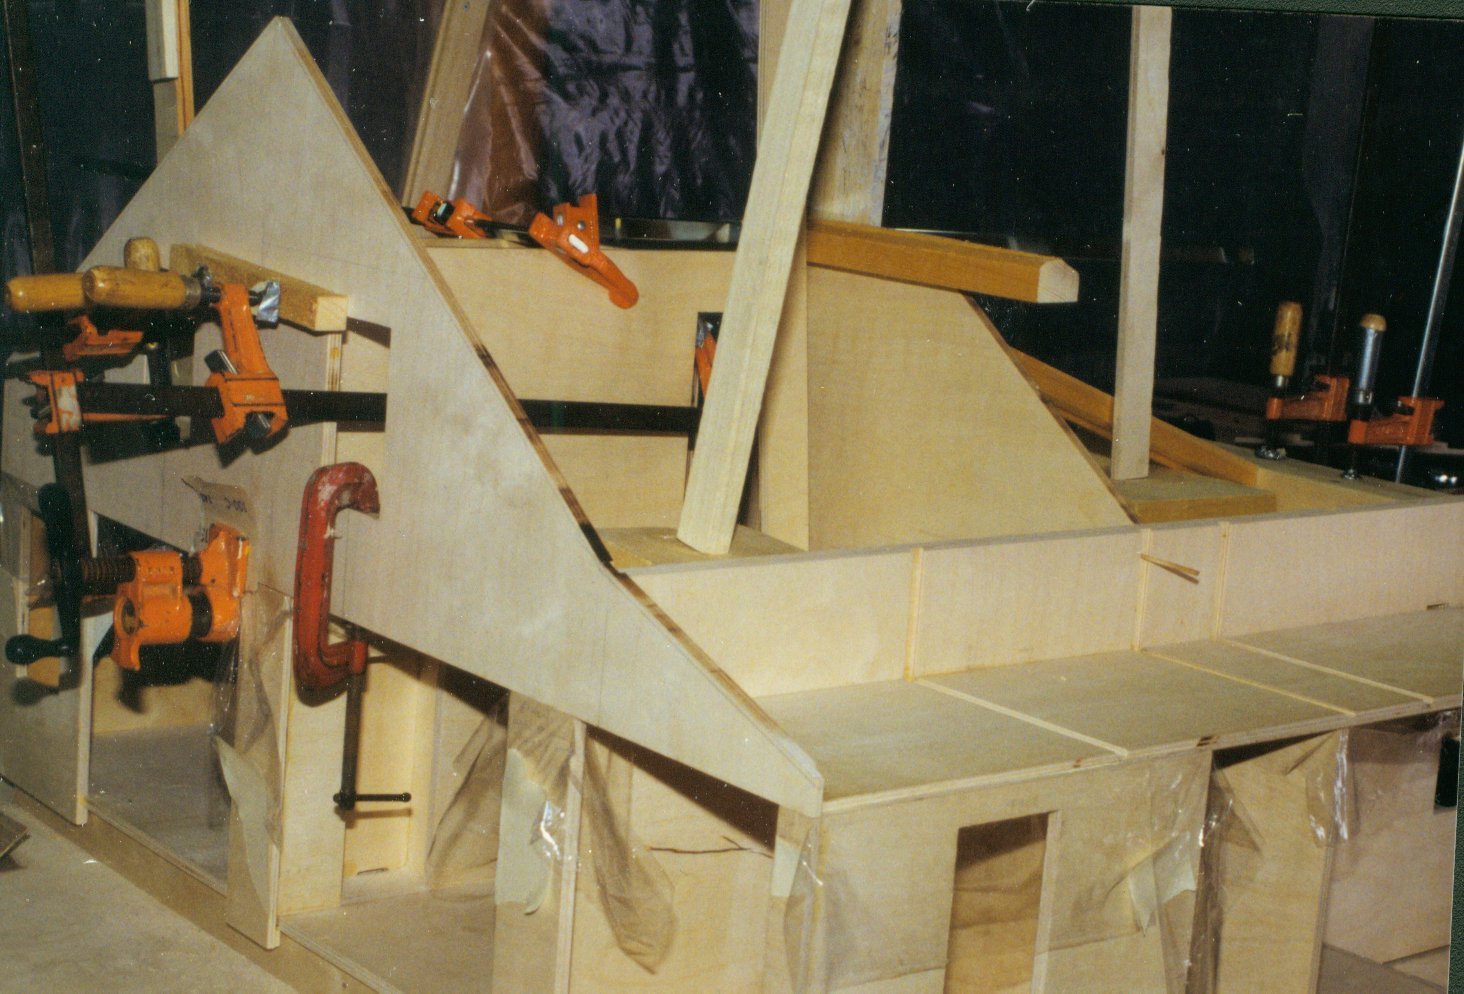
The first
photograph shows a position check of the interior walls. The slots have
been routed into the first floor base and interior walls, but the walls
have not yet been glued into place. Note that the interior doors have
not yet been cut. The view is of the south side or rear of the house
showing the kitchen, dining room and library. Since this plywood has a
very slight tendency to warp, the four corners are braced into position
on the foundation.
|
 |
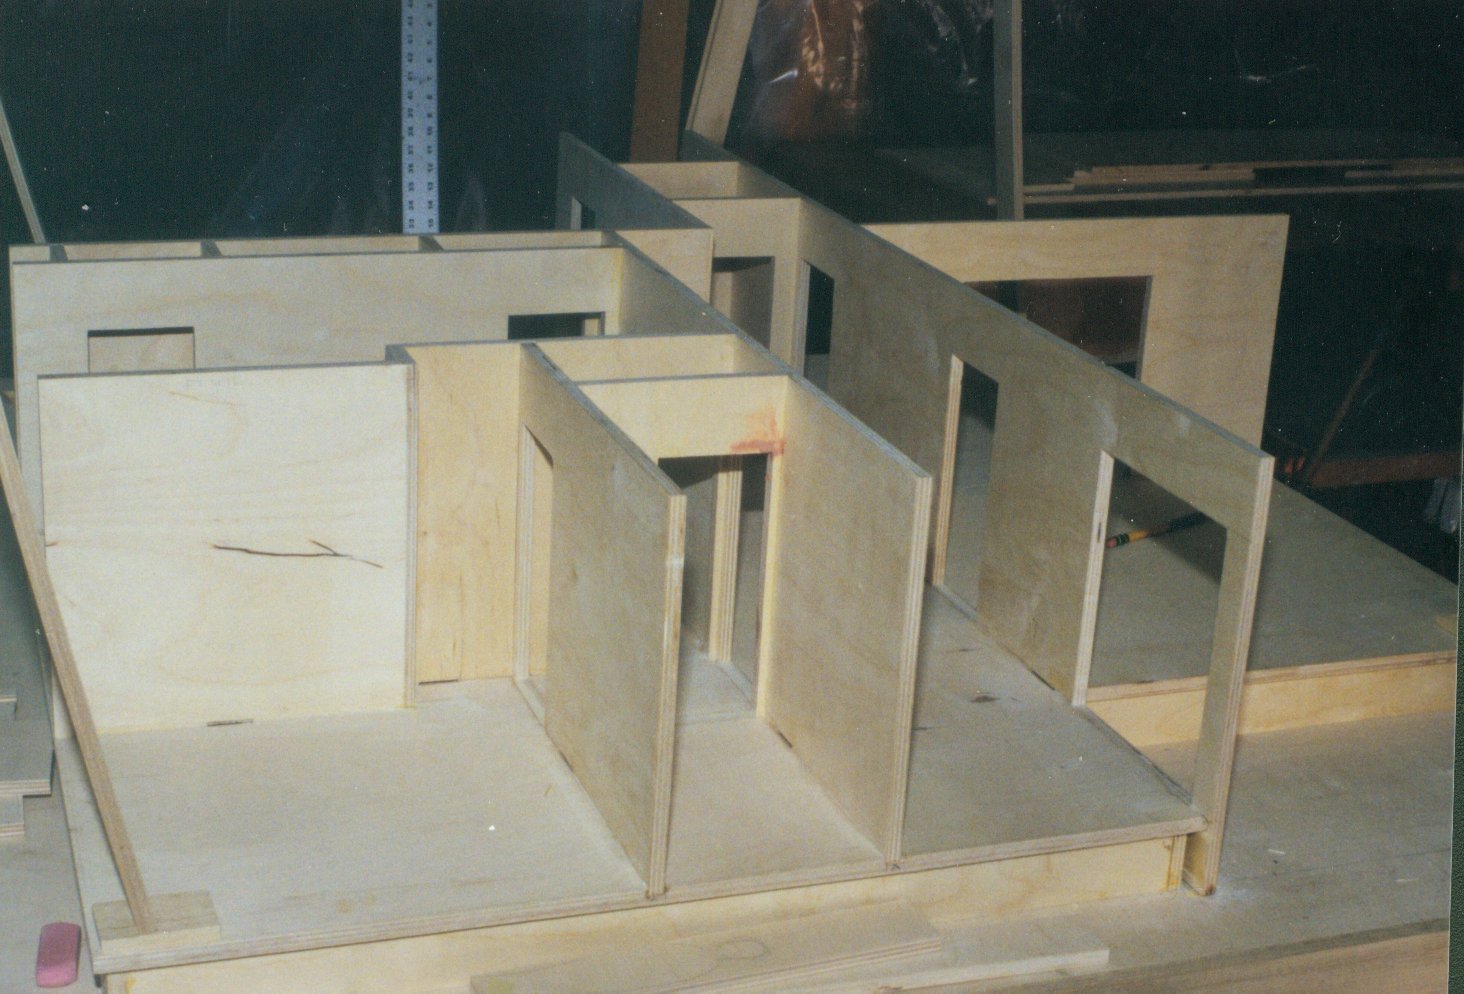
The second
photograph shows the interior walls glued into place. The doors have
now been cut in the interior walls. The view is of the east side
of
the house showing the front hallway, first floor bathroom and the
library. The exterior walls have not yet been glued into place.
|
 |
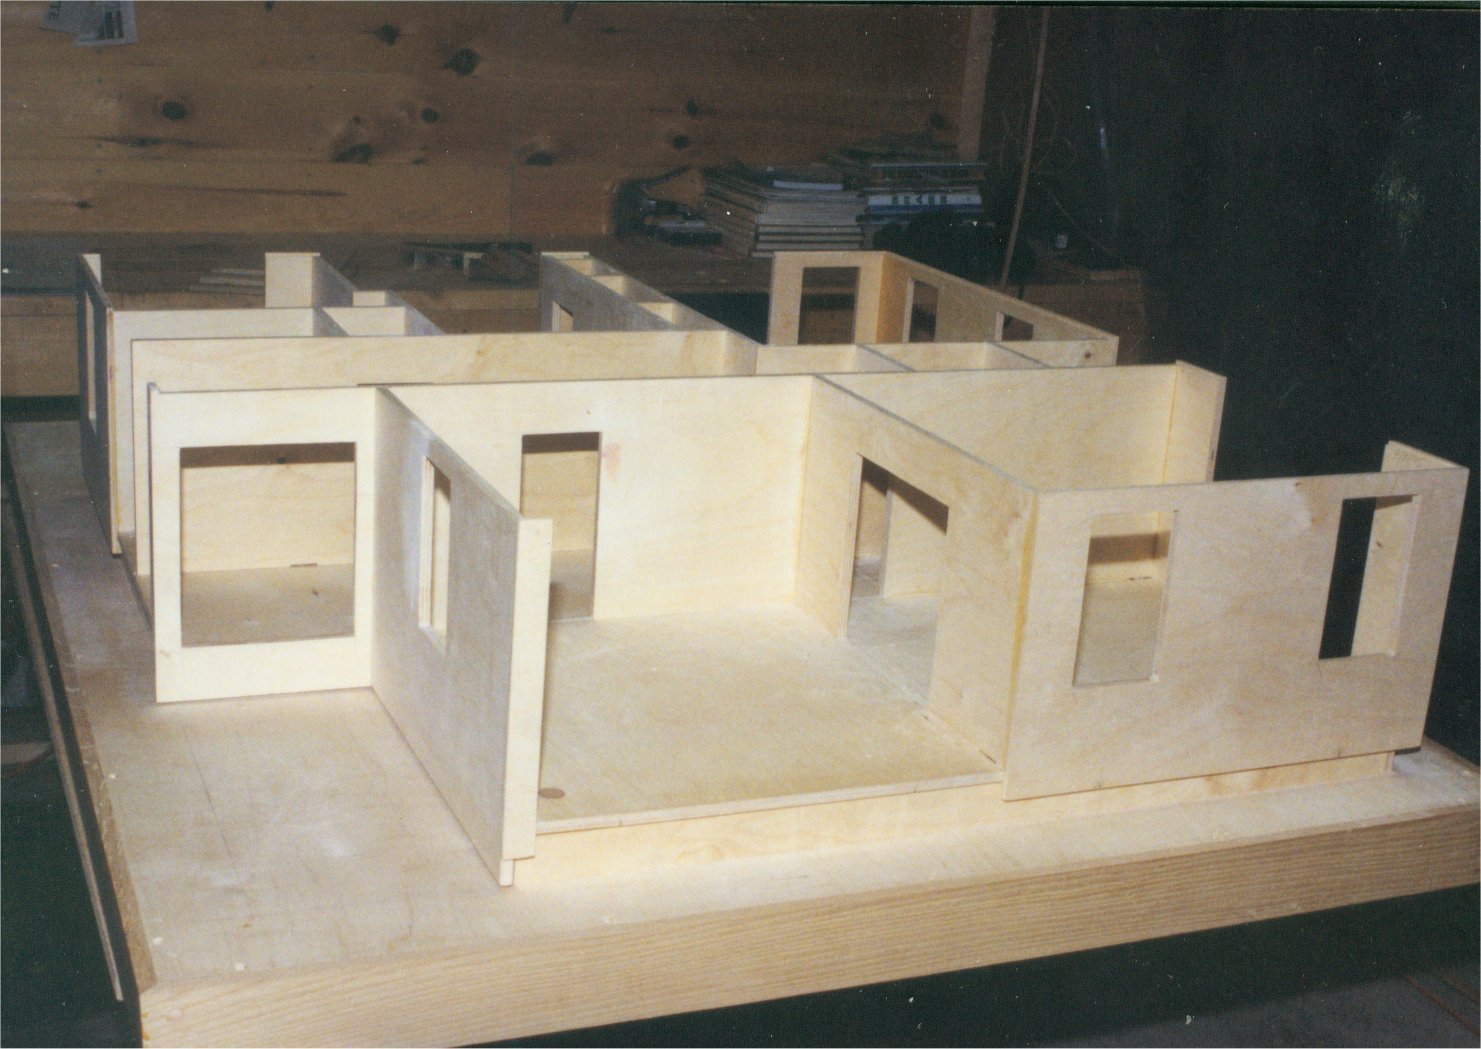
The third
photograph shows the exterior walls glued into place. The view is of
the south side or rear of the house. Note that the window
openings have been cut and that there are large missing sections in the
exterior walls where the panel openings will be. One may also note the
double wall between the kitchen and dinning room. This double wall
contains the main chimney and serves as the route for the electrical
wires
to pass up to the attic where the switches are located. If you click on
the
photograph to get an enlarged view, you can see the exterior wall
overhanging the foundation.
|
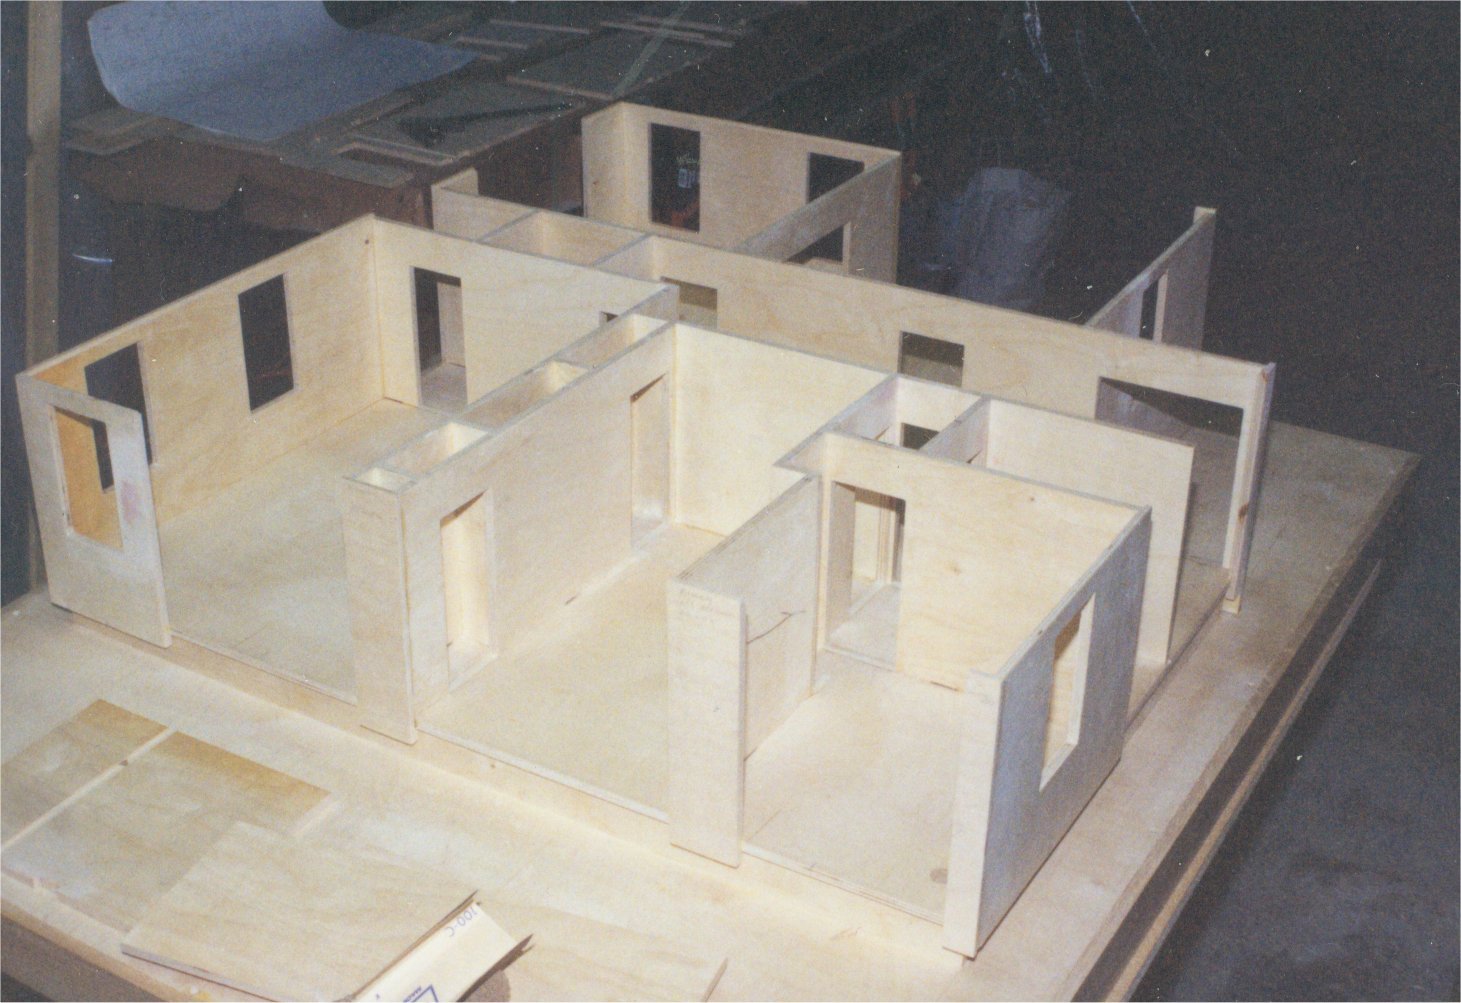 |
The next
photograph shows the north elevation or front of the house. Again the
movable panels are missing. Note that the wall containing the front
door and
east wall facing the front porch extends all the way to the base. The
miniature's front porch is a removable and separate section from the
first floor
and will fit into this space which is approximately 9" by 15". It was
constructed this way so that when the dollhouse is being moved, it is
not necessary to hold onto the more delicate decorative gingerbread
brackets that adorn the front porch.
|
 |
This
photograph shows the construction of the second floor. The second floor
was positioned and clamped down while the front wall is glued into
place. Note the bracing needed to keep the second floor flat. One may
also note the cellophane wrapping around parts of the first floor. This
is to prevent and excess epoxy oozing out and gluing the second floor
to the first floor.
|
 |
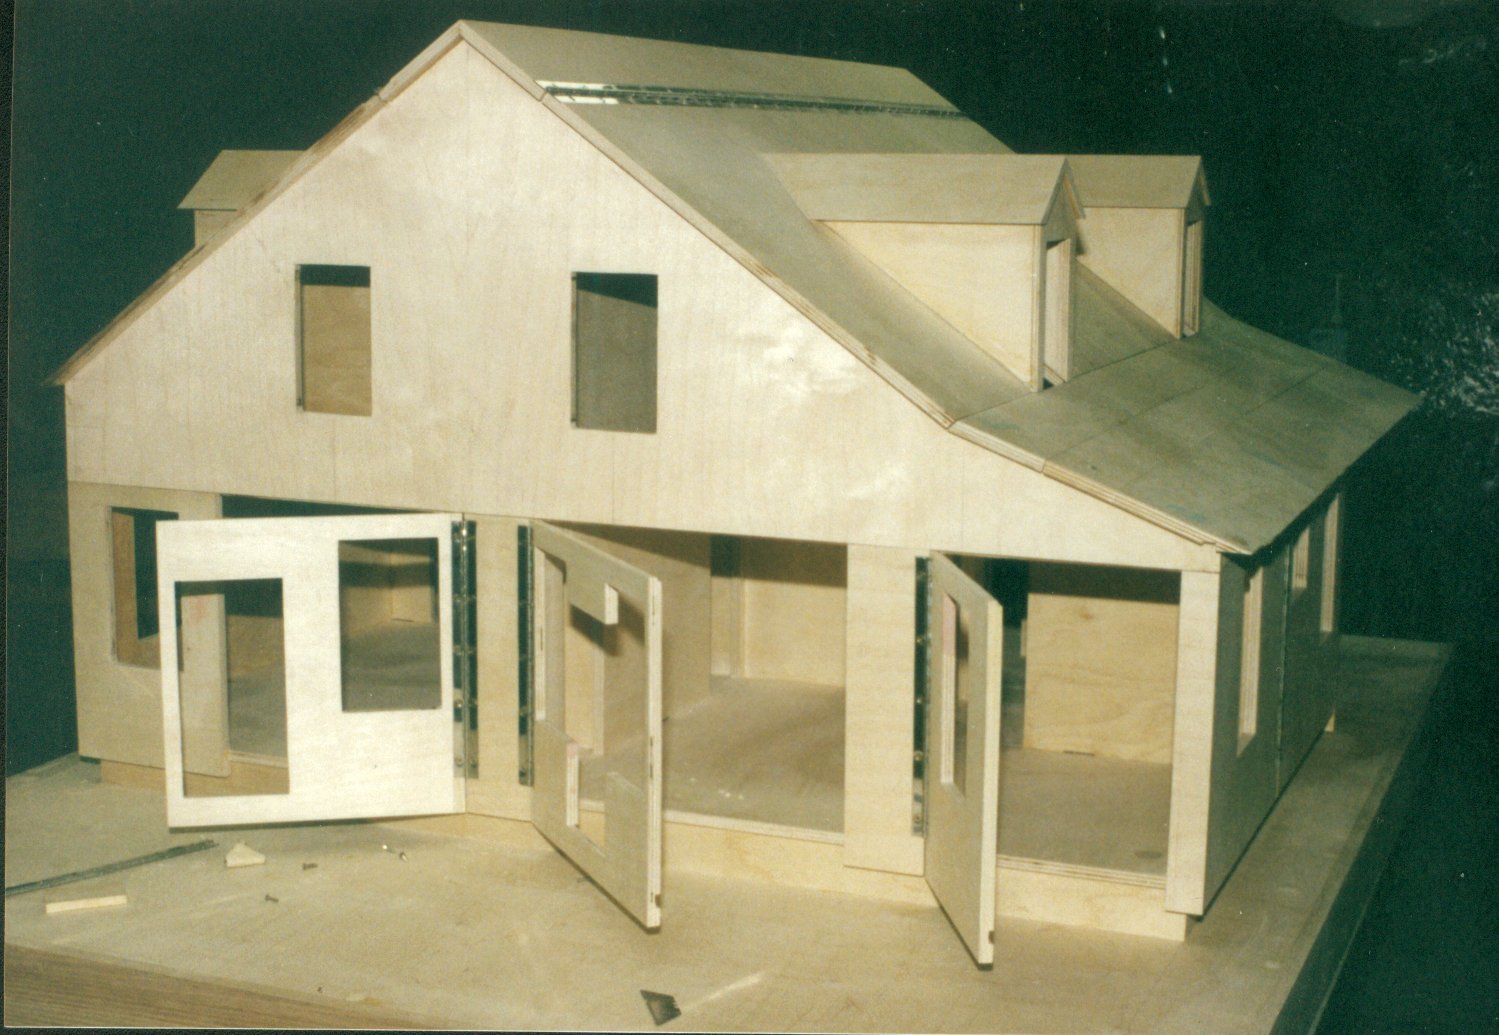
This
photograph shows the completed shell with the panel openings in place.
These panels are attached to the exterior walls with piano hinges.
These hinges are recessed into the wall so that they lie flush with the
outer surface of the wall. The
view is of the south elevation showing the openings to the kitchen,
dinning room and library. The view also shows the dormers in place.
|
 |
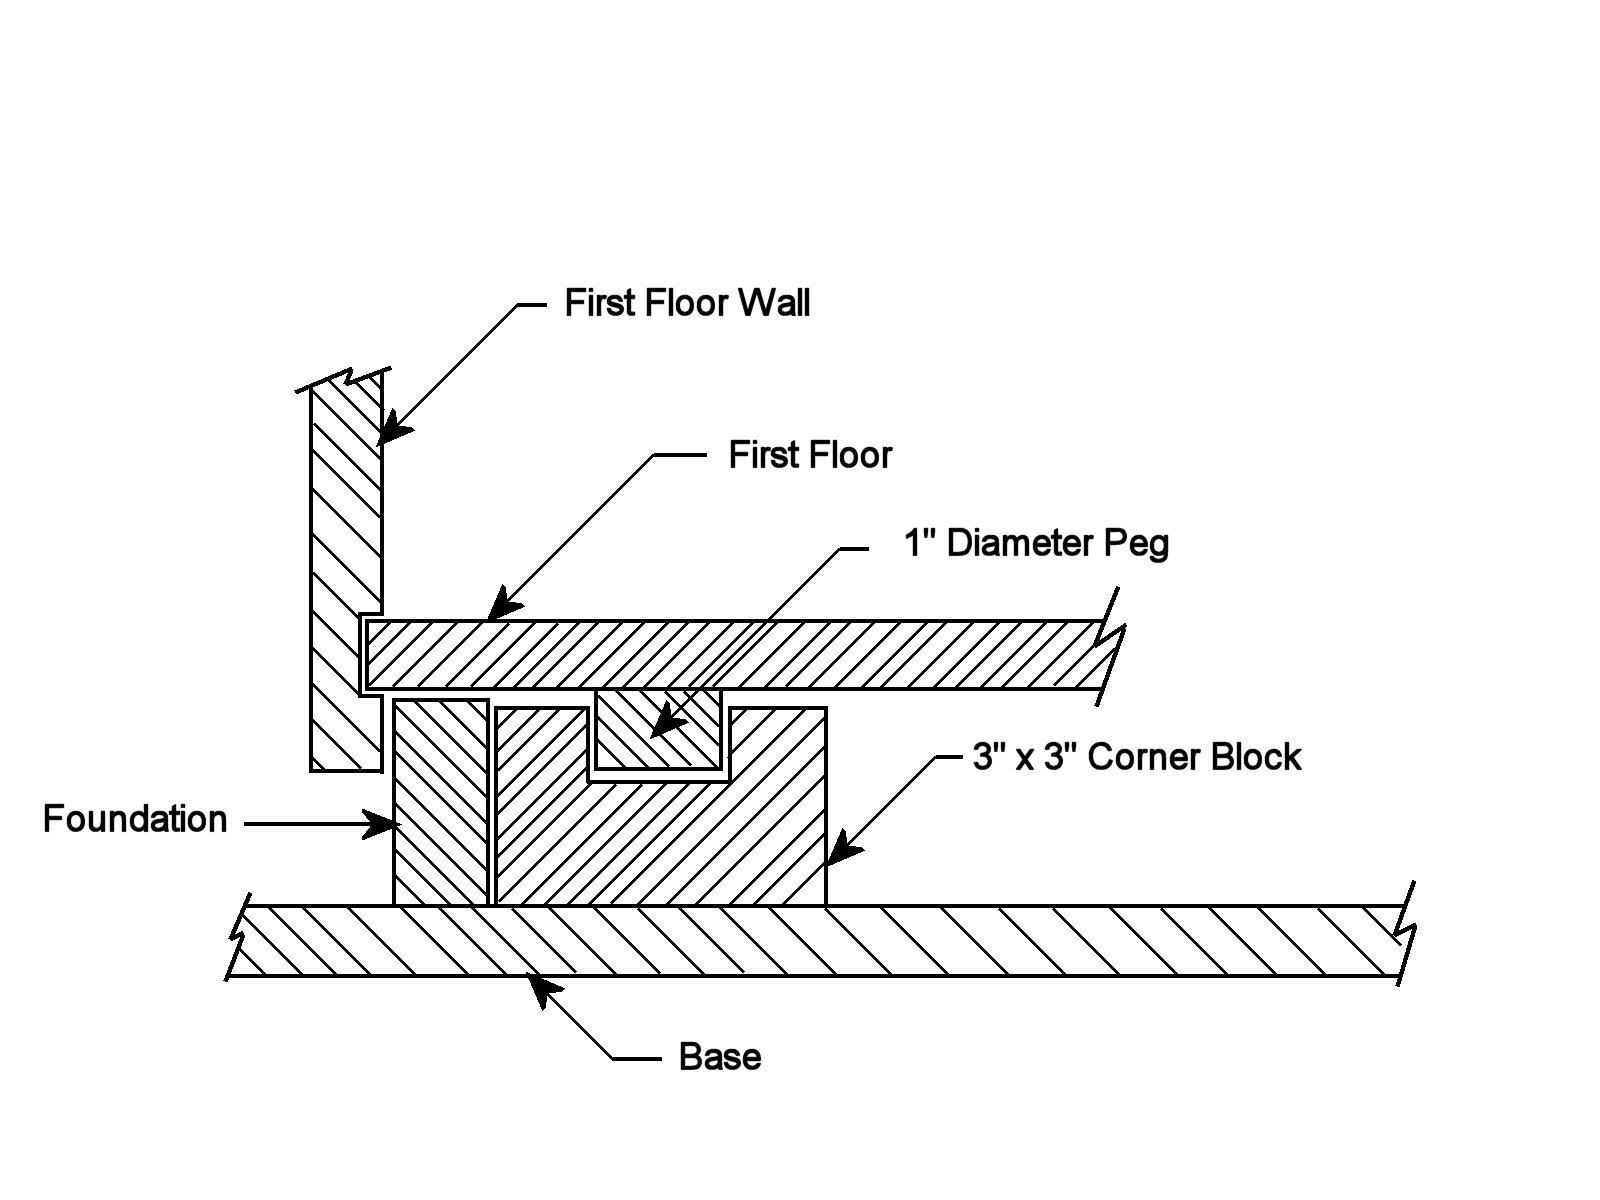
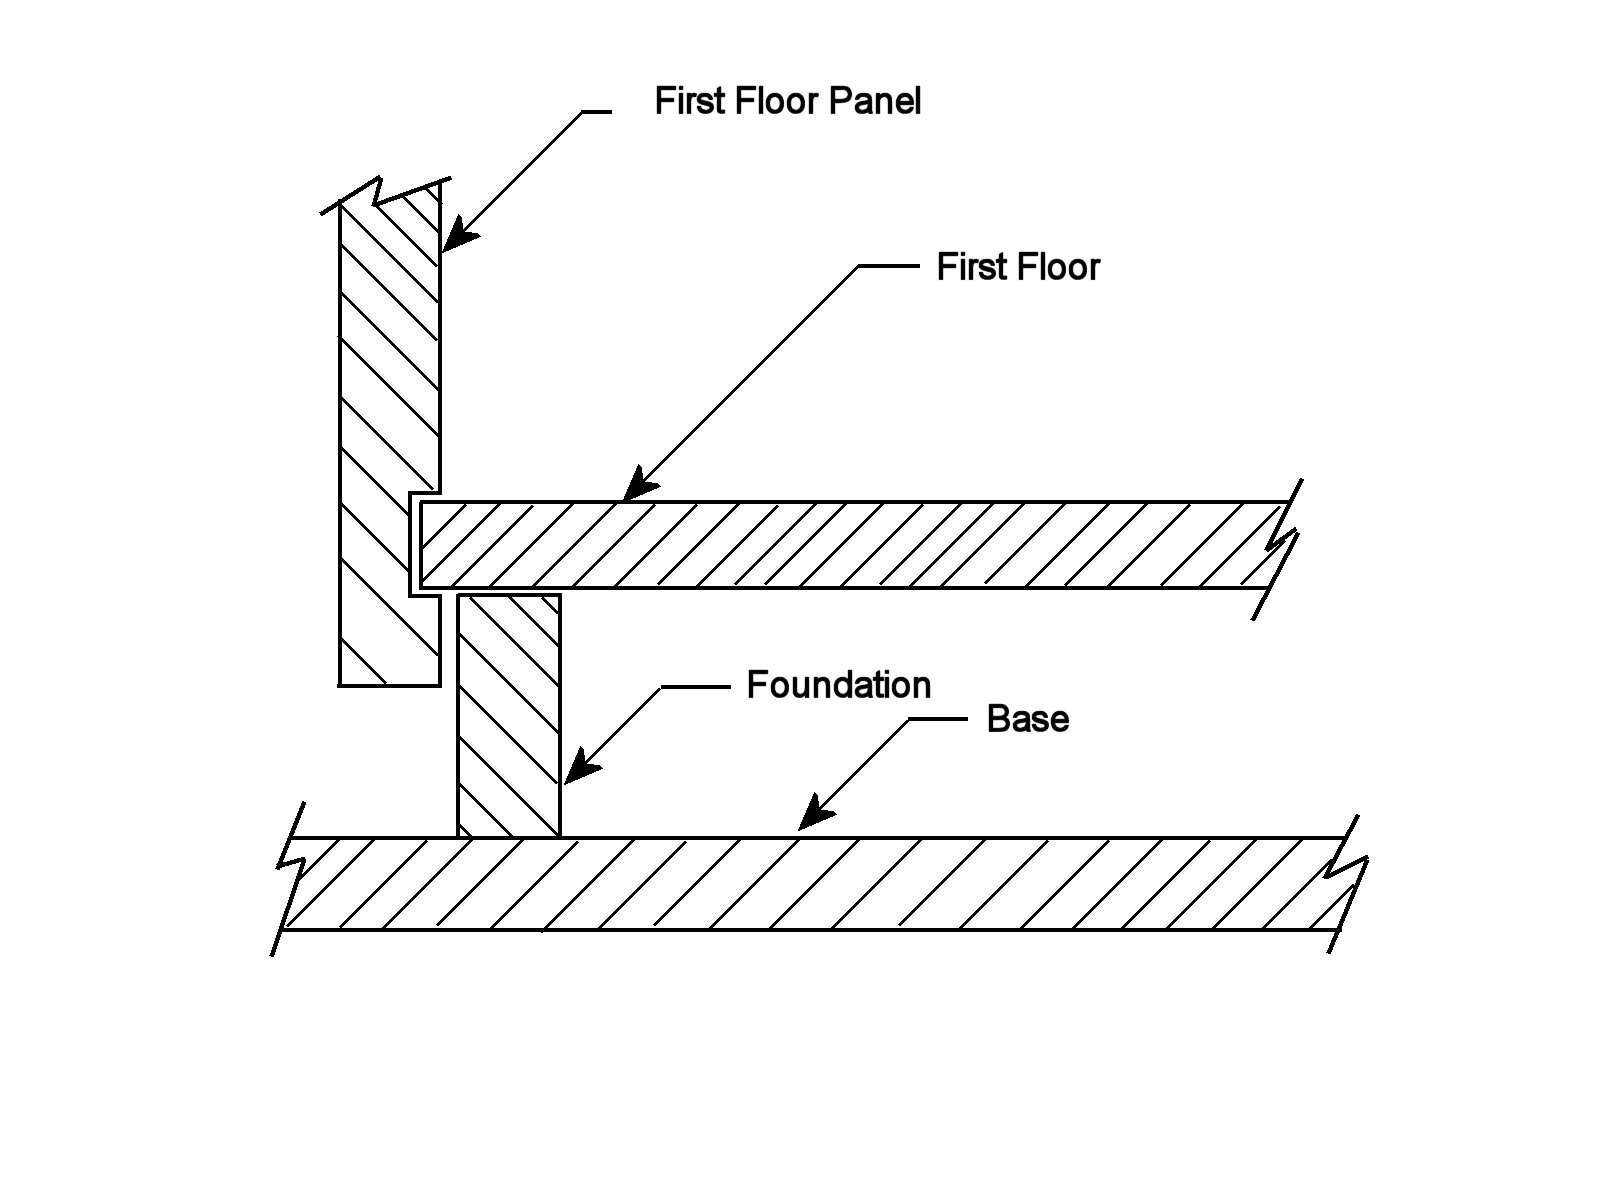
This figure
shows a crossection (not to scale) of a corner and the
construction used to position the first floor properly on the
foundation. A 1" diameter wooden peg mounted under the first floor fits
into a 1" diameter hole drilled into a 3" by 3" block. In addition the
outer walls of the first floor overhang the foundation by 1".
|
 |
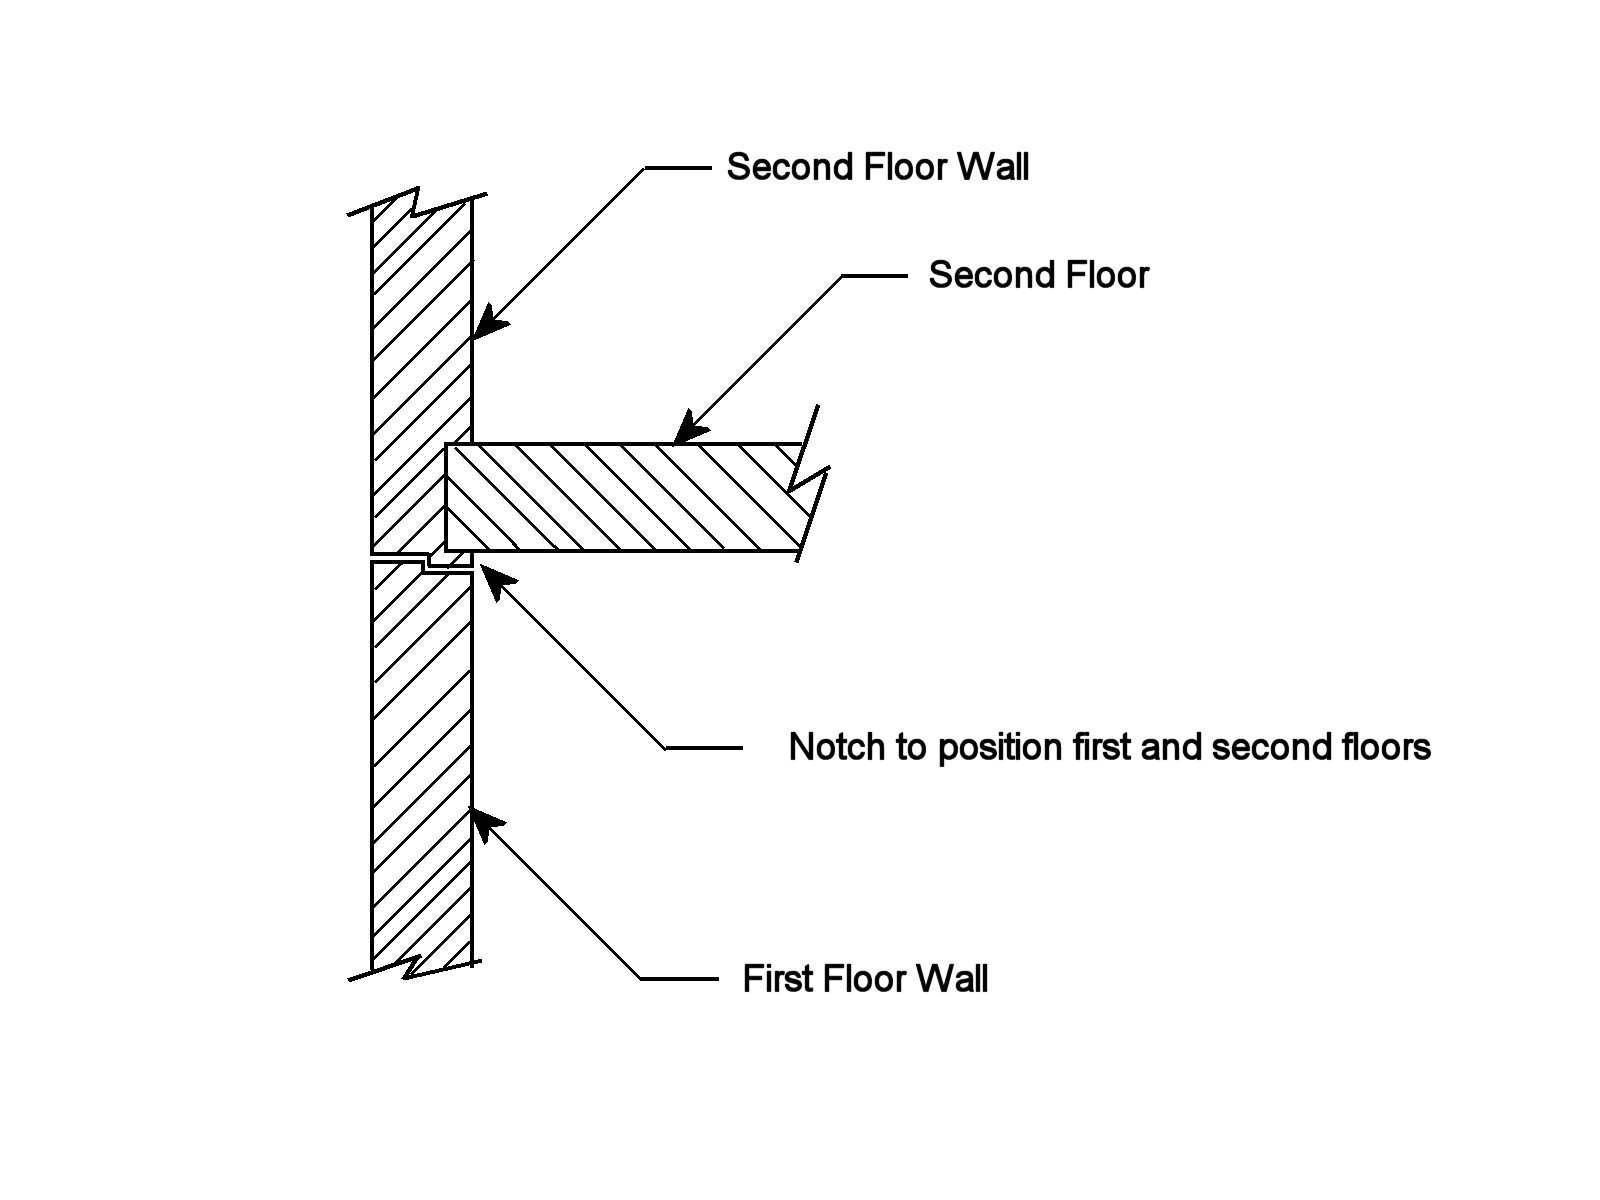
The second
floor is held in place using the construction shown on the figure to
the right. Note how the overlapping notches position the second floor
onto the first floor.
|
 |
In addition,
the panels that open to expose the interior of the dollhouse have a
3/8" wide by 1/8" deep grove. When the panel is closed, this grove fits
exactly into the first floor.
|
 |
The last
photograph shows the completed shell temporarily stored in our upstairs
guest room. The view is of the north east corner of the house. If you
click on the photograph to get an enlarged view, you can see the
exterior molding under the eaves and dormers which were milled from
white pine. All of the exterior moldings are exactly the same shapes as
on the full size house.
|
 |